Authoring First iOS Test
Let us create a test that performs login to swaglabs app
Download the app
Ekam expects to have the mobile app under the app folder of the root directory of the project. Execute the following command from the app folder to download the sample application, or you could manually download the app and place it under the app folder.
iOS Simulator
If you are using iOS simulator, execute below command from app folder
wget https://github.com/saucelabs/sample-app-mobile/releases/download/2.7.1/iOS.Simulator.SauceLabs.Mobile.Sample.app.2.7.1.zip
Once the zip file gets downloaded, unzip it & rename the app folder to sample.app
iOS device
wget https://github.com/testvagrant/Ekam-Template/releases/download/iosapp/sample_app.ipa
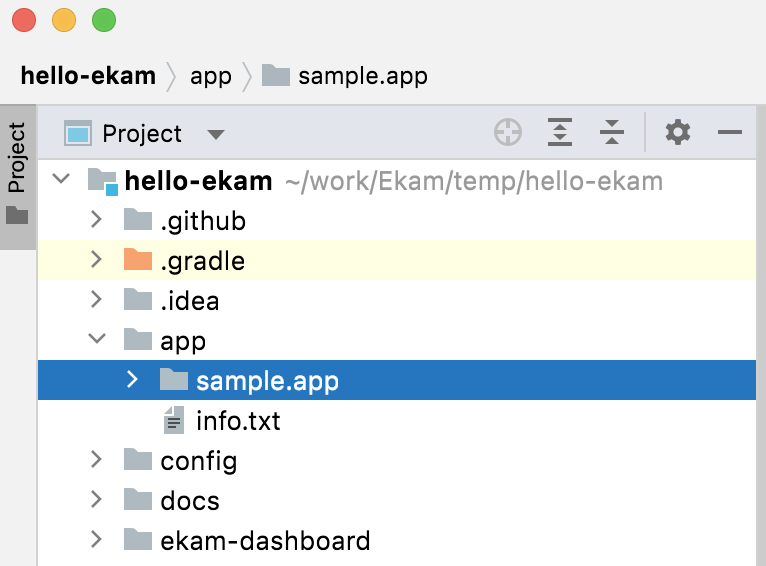
Specify the app name and other capabilities
Let us specify the name of the app & few mandatory desired capabilities to launch the application
Open resources/mobile/mobilefeed.json file & edit properties as below
iOS Simulator
{
  "desiredCapabilities": [
    {
      "app": "sample.app",
      "platformName": "iOS",
      "automationName": "XCUITest"
    }
  ]
}
iOS device
{
    "desiredCapabilities": [
        {
            "app": "sample_app.ipa",
            "platformName": "iOS",
            "automationName": "XCUITest"
        }
    ]
}
Filter your devices to execute tests
iOS Simulator
Run the below command to get the UDID of simulator
➜  ~ xcrun simctl list | grep "Booted"
    iPhone 12 (1E3B54A1-3D0A-45FF-A5D9-AC2C569222D3) (Booted)
Under resources/mobile create a file device_filters.json and UDID as below
{
  "platformVersion": {
    "include": [],
    "operator": "",
    "exclude": []
  },
  "model": {
    "include": [],
    "exclude": []
  },
  "udid": {
    "include": ["1E3B54A1-3D0A-45FF-A5D9-AC2C569222D3"],
    "exclude": []
  }
}
iOS device
Under resources/mobile create a file device_filters.json and specify the model
{
  "platformVersion": {
    "include": [],
    "operator": "",
    "exclude": []
  },
  "model": {
    "include": [
      "iPhone 11 Pro"
    ],
    "exclude": []
  },
  "udid": {
    "include": [],
    "exclude": []
  }
}
Specify the mobilefeed & device filtes in the config
Open config/default.properties file & edit the properties as below.
Target mobile platform is android by default. Specify it as ios explicitly.
# Target mobile platform eg: android | ios
mobile.target: ios

# Feed file having desiredCapabilities
mobile.feed: mobilefeed

# Filters to chose devices for test execution
mobile.filters: device_filters
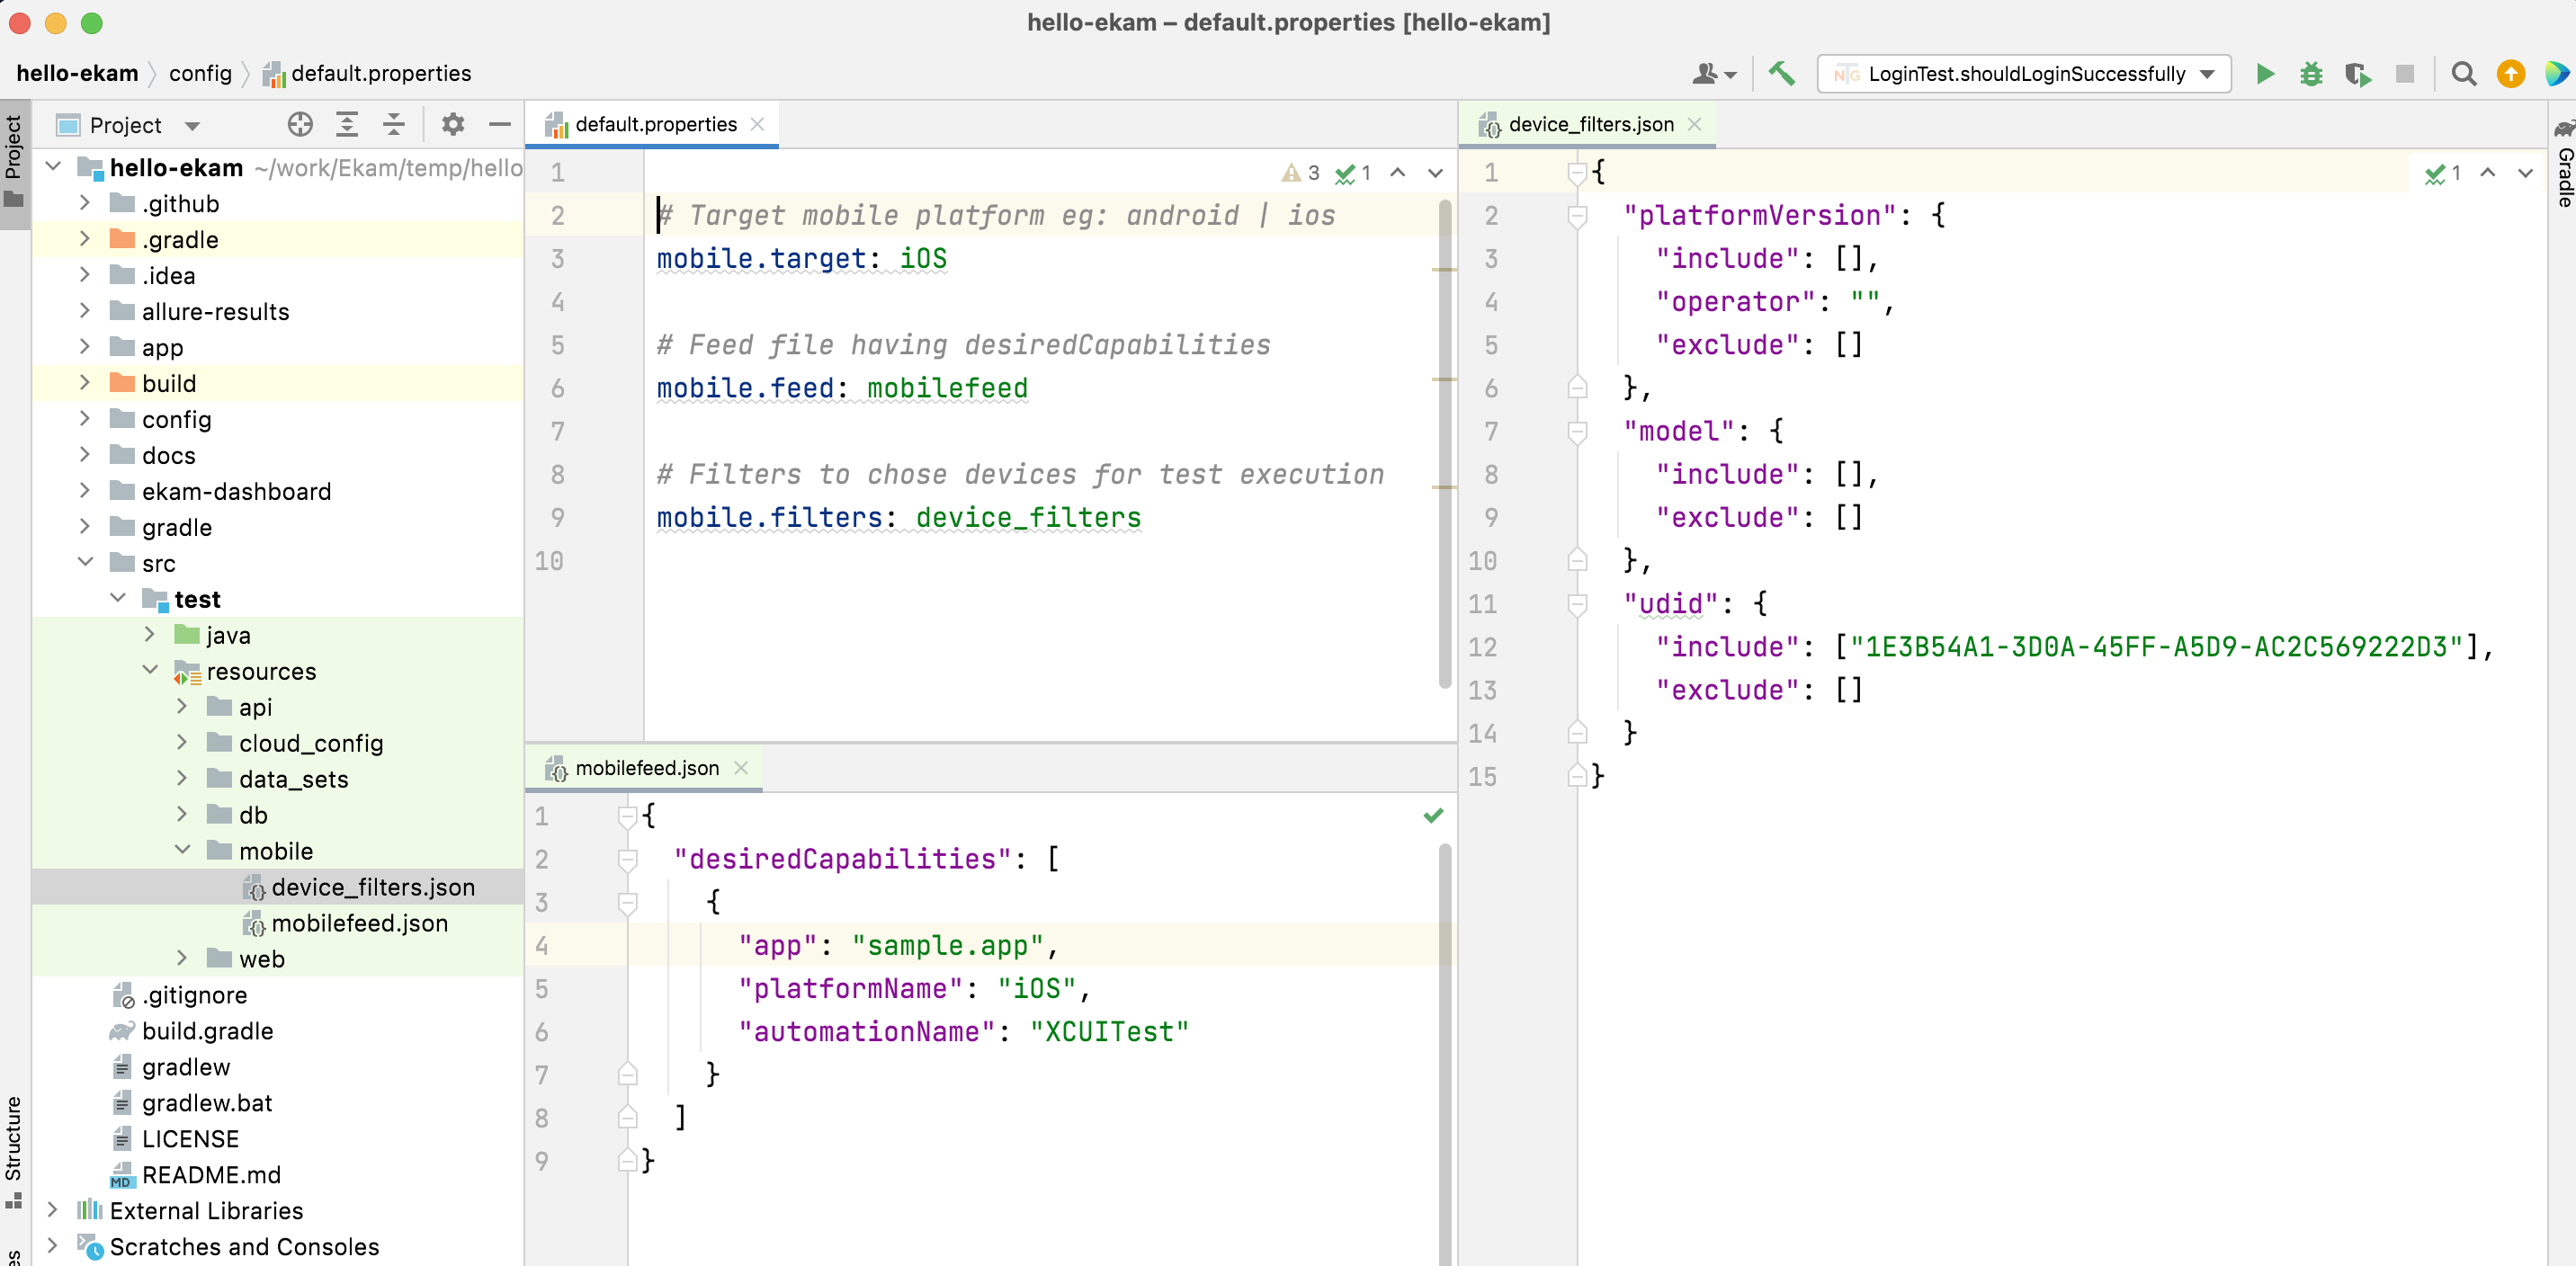
Generate Screen class
Create a new package called screens under mobile to hold all screen classes. In mobile test automation we are using Screen just like a Page in Page Object Model
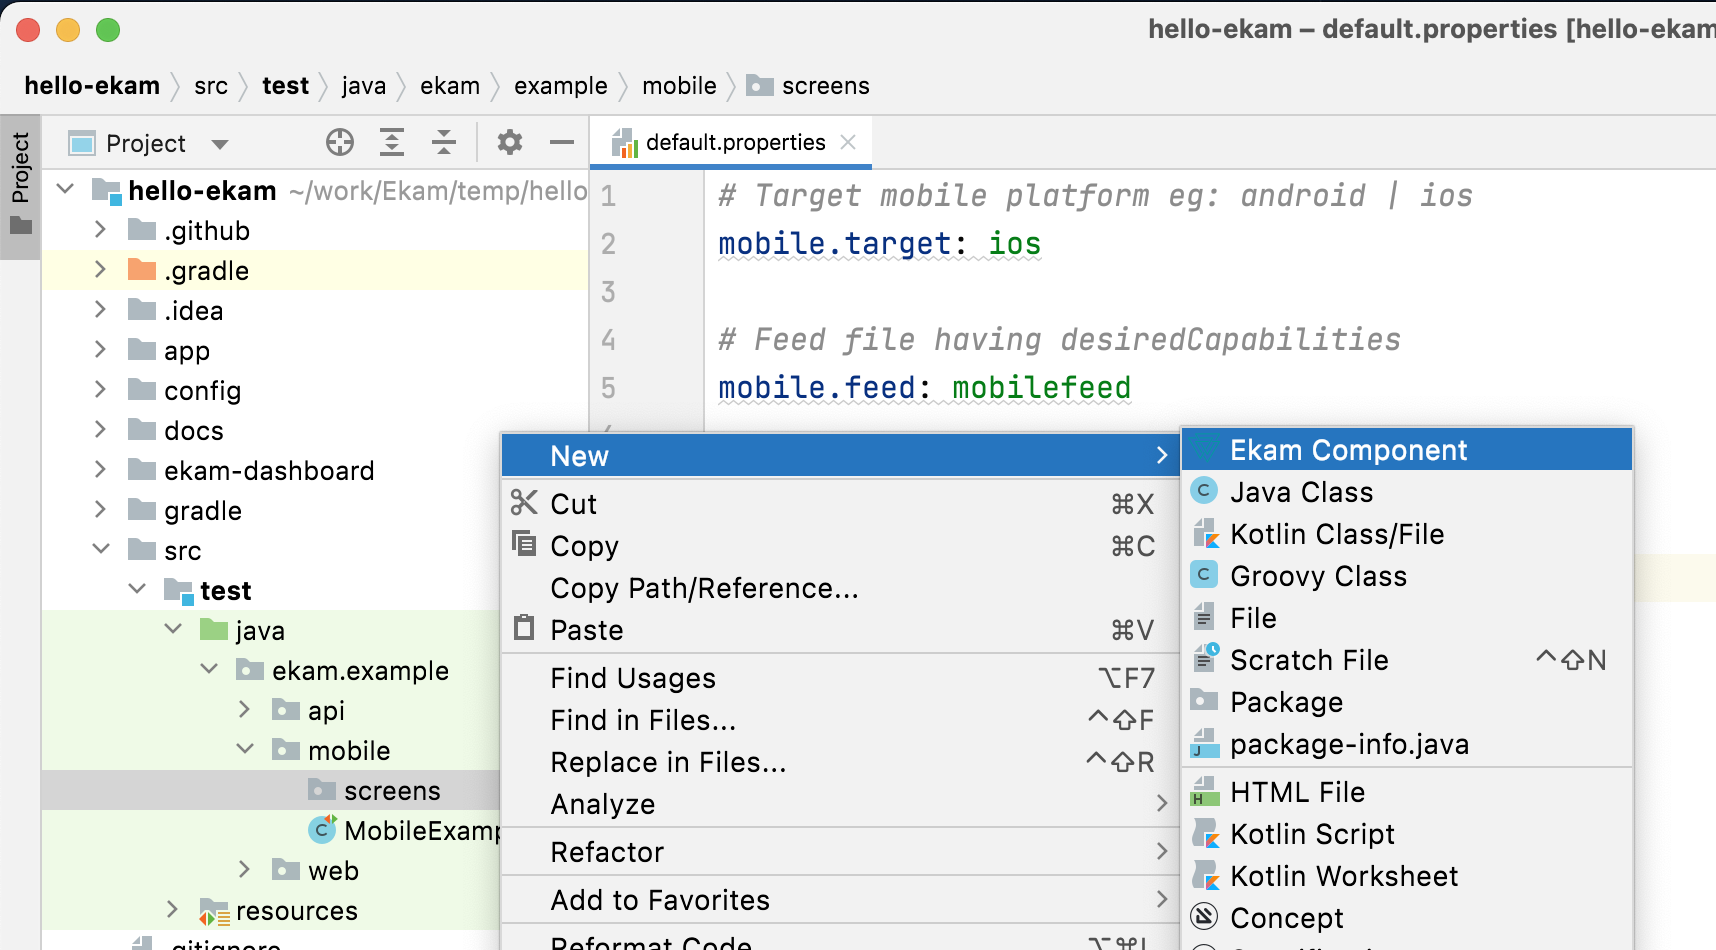
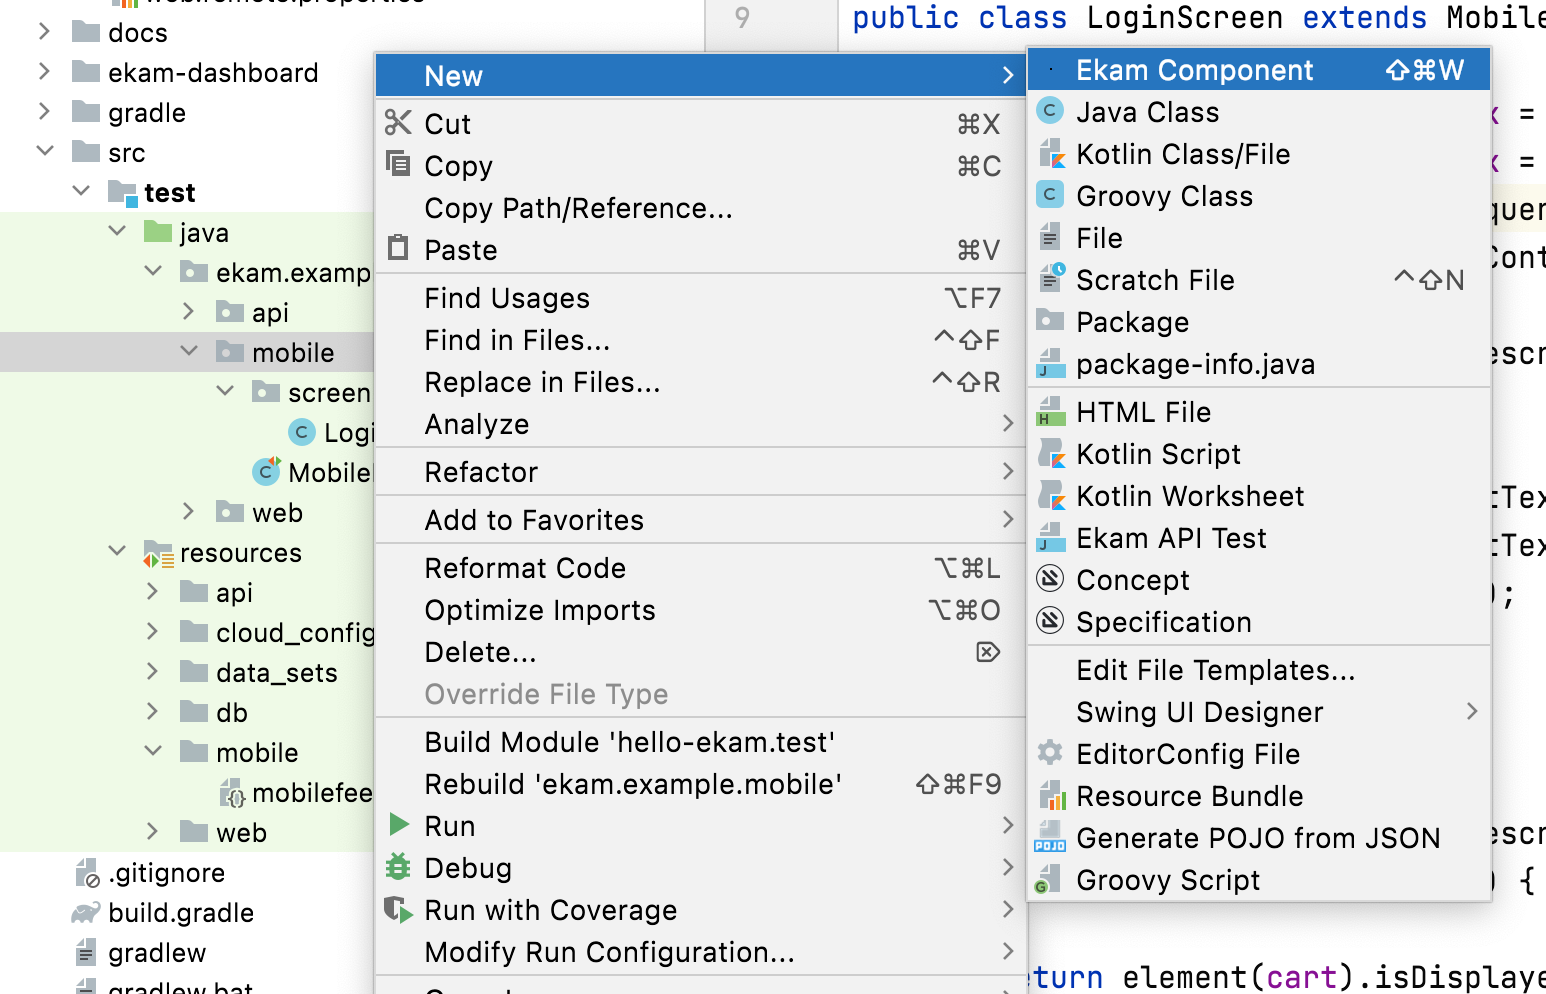
Let us create a screen class for login screen. Right-click on the screens folder and choose New → Ekam Component
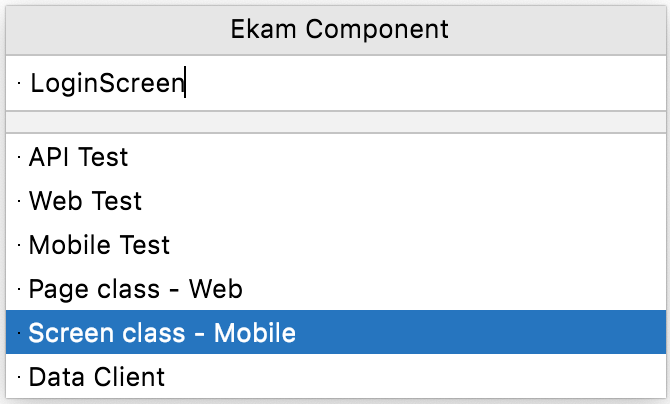
In the Ekam Component menu choose Screen class - Mobile. Enter name as LoginScreen. Hit enter.
This will generate a screen class with the below code
package ekam.example.mobile.screens;

import com.testvagrant.ekam.atoms.mobile.MobileScreen;
import com.testvagrant.ekam.reports.annotations.MobileStep;
import org.openqa.selenium.By;

import static org.testng.Assert.*;

public class LoginScreen extends MobileScreen {

    @MobileStep(keyword = "When", description = "I login")
    public LoginScreen login() {
        return this;
    }
}
Let us declare By statements for - Username, password, and login buttons.
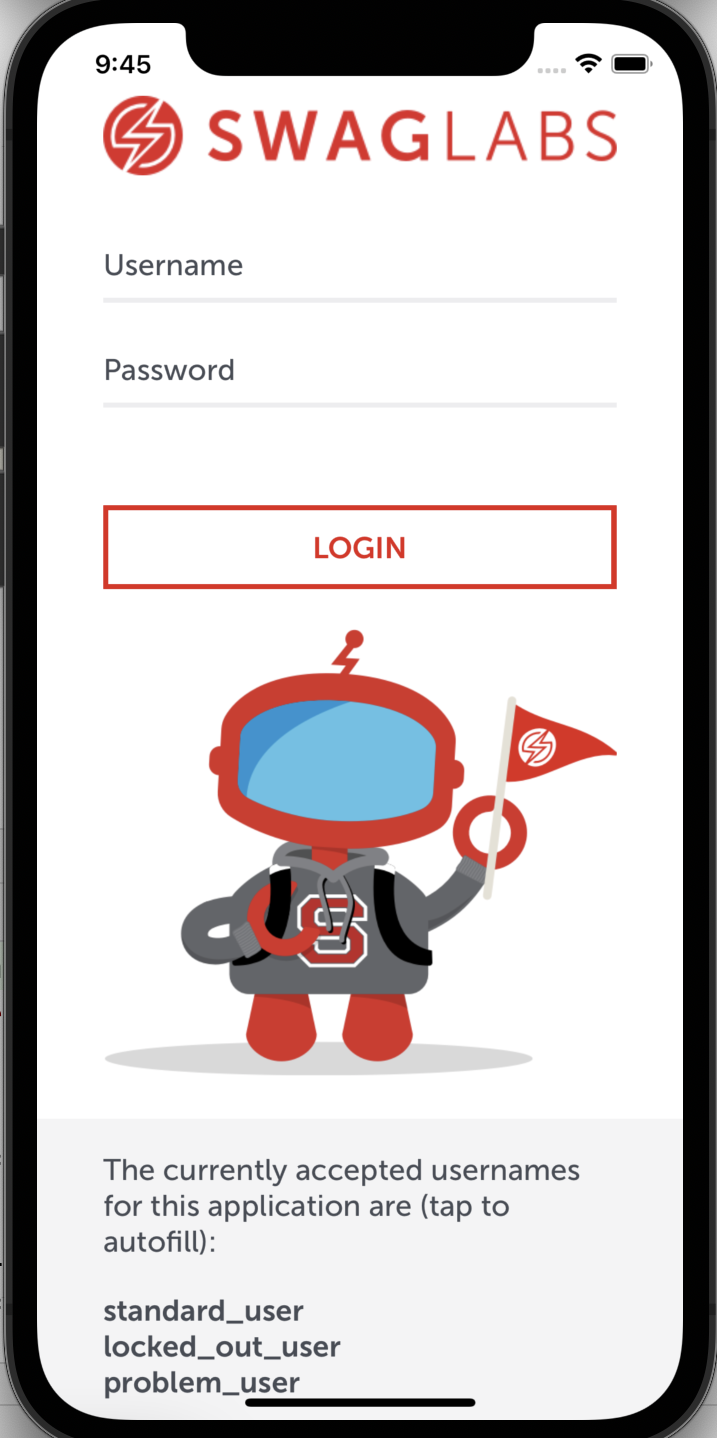
Ekam plugin provides a mechanism to generate By statements. Type abbreviation and hit Tab to generate the live template & complete the code.

Declare By statements as below:
package ekam.example.mobile.screens;

import com.testvagrant.ekam.atoms.mobile.MobileScreen;
import com.testvagrant.ekam.reports.annotations.MobileStep;
import org.openqa.selenium.By;

import static org.testng.Assert.*;

public class LoginScreen extends MobileScreen {

    private final By usernameTextBox = queryById("test-Username");
    private final By passwordTextBox = queryById("test-Password");
    private final By loginButton = queryById("test-LOGIN");

    @MobileStep(keyword = "When", description = "I login")
    public LoginScreen login() {
        return this;
    }
}
Ekam Provides below live templates to locate elements.
| Abbrevation | Locator Strategy |
|---|---|
| qbcd | Query By Content Description |
| query | Query by xpath or css |
| qbi | Query by Id |
Implement the login method as below
    @MobileStep(keyword = "When", description = "I login")
    public LoginScreen login() {

        textbox(usernameTextBox).setText("standard_user");
        textbox(passwordTextBox).setText("secret_sauce");
        element(loginButton).click();

        return this;
    }
Ekam provides abstractions to interact with elements gracefully.
| Abstraction | |
|---|---|
| textbox | Represents a textbox element. |
| element | Represents a generic element. |
The login method would log in to the application with the given credentials. Let us add a new method that would return if the cart is shown upon successful login.
Lets declare By statement for the cart icon.
private final By cart = queryById("test-Cart");
To add new method, Ekam provides a live template. Type mobilestep and expand by hitting Tab to generate a screen method. Otherwise, the same can be done by generating the code (Contol + Enter) and choose Ekam Mobile Step
Complete the template to generate code as below.
    @MobileStep(keyword = "Then", description = "Return if cart is displayed")
    public boolean isCartDisplayed() {
        return element(cart).isDisplayed();
    }
The LoginScreen class would like as below:
package ekam.example.mobile.screens;

import com.testvagrant.ekam.atoms.mobile.MobileScreen;
import com.testvagrant.ekam.reports.annotations.MobileStep;
import org.openqa.selenium.By;

import static org.testng.Assert.*;

public class LoginScreen extends MobileScreen {

    private final By usernameTextBox = queryById("test-Username");
    private final By passwordTextBox = queryById("test-Password");
    private final By loginButton = queryById("test-LOGIN");
    private final By cart = queryById("test-Cart");

    @MobileStep(keyword = "When", description = "I login")
    public LoginScreen login() {
        textbox(usernameTextBox).setText("standard_user");
        textbox(passwordTextBox).setText("secret_sauce");
        element(loginButton).click();
        return this;
    }

    @MobileStep(keyword = "Then", description = "Return if cart is displayed")
    public boolean isCartDisplayed() {
        return element(cart).isDisplayed();
    }
}
Generate Test
Now that our Page class is ready, let us add a test.
Right-click on mobile package choose New → Ekam Component
In the Ekam component popup, select Mobile Test & enter the name as LoginTest
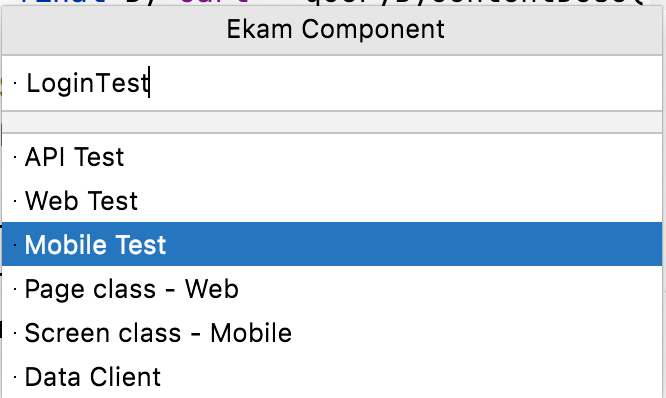
This will generate a LoginTest as shown below
package ekam.example.mobile;

import com.testvagrant.ekam.testBases.testng.MobileTest;
import static com.testvagrant.ekam.commons.LayoutInitiator.*;
import org.testng.annotations.Test;
import static org.testng.Assert.*;

public class LoginTest extends MobileTest {

    @Test(groups = "mobile")
    public void mobileExampleTest() {

    }
}
Let us call the login method of LoginScreen to complete the test as below
Here is the complete code of the test.
package ekam.example.mobile;

import com.testvagrant.ekam.testBases.testng.MobileTest;
import static com.testvagrant.ekam.commons.LayoutInitiator.*;
import ekam.example.mobile.screens.LoginScreen;
import org.testng.annotations.Test;

import static org.testng.Assert.*;

public class LoginTest extends MobileTest {

    @Test(groups = "mobile")
    public void shouldLoginSuccessfully() {

        boolean cartDisplayed = Screen(LoginScreen.class)
                .login()
                .isCartDisplayed();
        assertTrue(cartDisplayed, "Cart is not displayed");
    }
}
Execute Test
We need to make an IntelliJ IDEA setting change to execute tests via IDE
Preferences → Build, Execution, Deployment → Build Tools → Gradle
Run tests using: IntelliJ IDEA
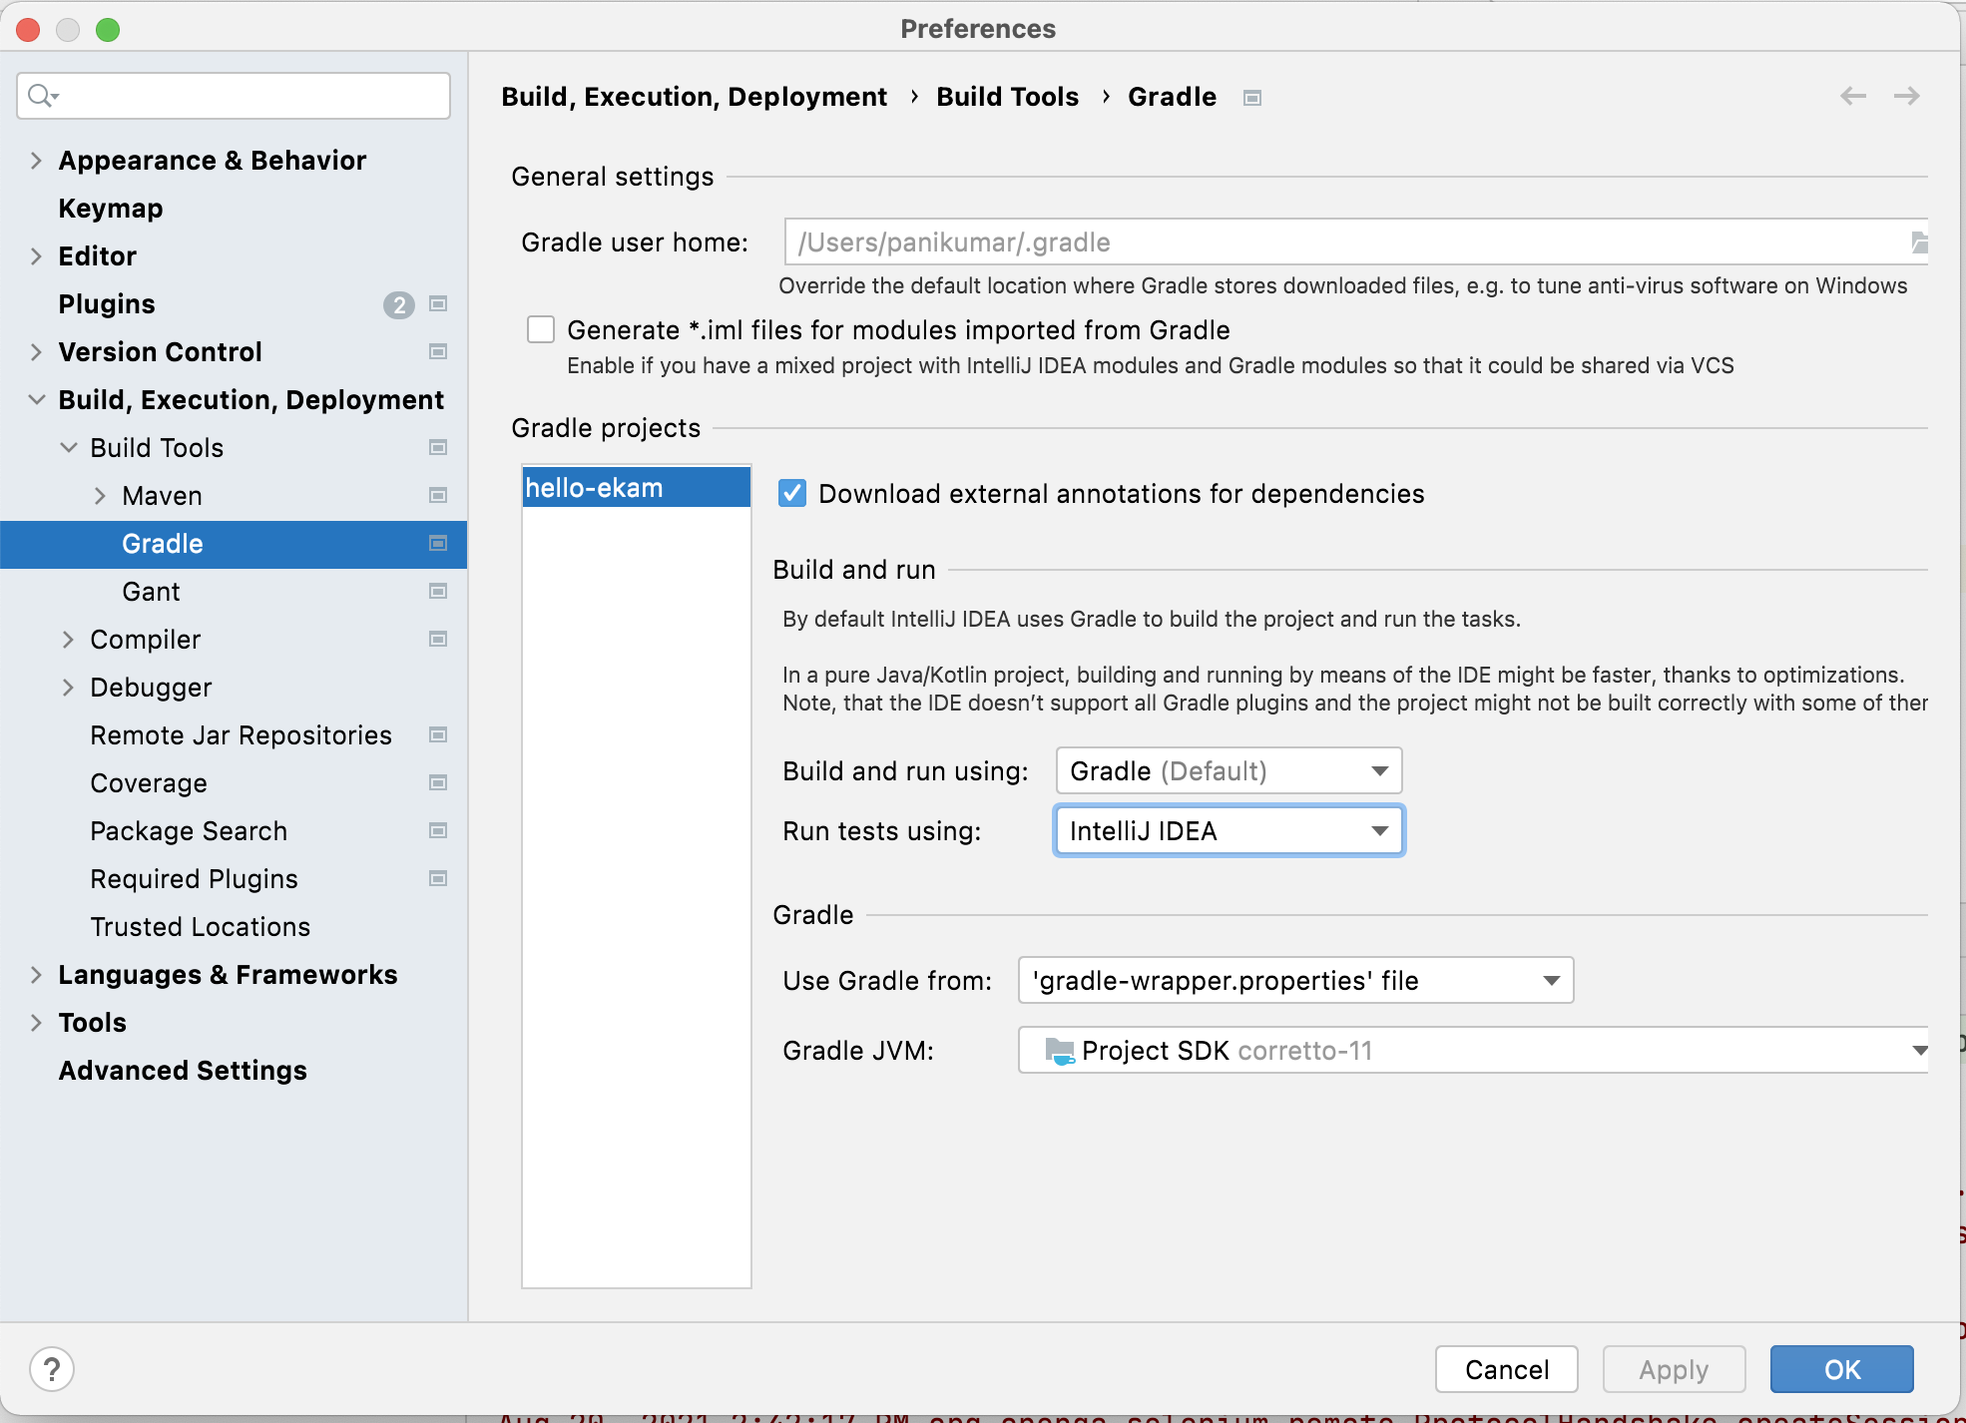
Execute the test from IDE !!
Congratulations !! on your first iOS test
